
How to Optimize for GoogleOther-Image and GoogleOther-Video
As Google continues to enhance its search capabilities, the introduction of new Googlebot crawlers like GoogleOther-Image and GoogleOther-Video signifies a shift towards more refined content discovery. Its possible that this will heavily impact in the upcoming New Google algorithm update 2024. Understanding how to optimize for these crawlers can significantly improve your site’s visibility and performance in search engine results. In this article, we’ll delve into effective strategies to optimize for GoogleOther-Image and GoogleOther-Video, adhering to Google’s E-A-T standards.
Understanding GoogleOther-Image and GoogleOther-Video
What are GoogleOther-Image and GoogleOther-Video? Will this be included in the New Google algorithm update 2024? Highly possible!
GoogleOther-Image and GoogleOther-Video are specialized crawlers designed to index image and video content more efficiently. These crawlers help Google understand and rank multimedia content, making it crucial for webmasters to optimize their images and videos accordingly.This article points out all the things you need if and when roll out for the new Google algorithm update 2024
How to Optimize for GoogleOther-Image and GoogleOther-Video
Optimize Image Content
Use Descriptive File Names
When uploading images, ensure the file names are descriptive and relevant to the content. For example, instead of “IMG1234.jpg,” use “solar-panel-installation.jpg.”
Steps to Optimize Image Content Using Descriptive File Names
- Choose Relevant Keywords: Identify keywords that are relevant to the image and the content it supports. Keywords should reflect what the image is about and include terms that potential users might search for.
- Be Specific: Ensure the file name specifically describes the content of the image. Avoid generic names like “image1.jpg” or “photo.jpg.”
- Use Hyphens to Separate Words: Use hyphens (-) to separate words in the file name. This improves readability for both users and search engines. Avoid underscores (_) as they are not treated as word separators by search engines.
- Keep it Short and Simple: While being descriptive, keep the file name concise. Long file names can be truncated and may look spammy.
- Avoid Keyword Stuffing: Don’t overuse keywords. Ensure the file name is natural and accurately describes the image.
Examples
- For a Blog Post on Healthy Breakfasts:
- Before: IMG1234.jpg
- After: healthy-breakfast-oatmeal-fruit.jpg
- For a Product Image on an E-commerce Site:
- Before: product1.jpg
- After: stainless-steel-water-bottle-500ml.jpg
- For an Article on Solar Panel Installation:
- Before: image002.jpg
- After: solar-panel-rooftop-installation.jpg
- For a Travel Blog Post on Paris:
- Before: photo_001.jpg
- After: eiffel-tower-paris-sunset.jpg
Best Practices
- Align with Page Content: Ensure the file name aligns with the content of the page where the image is used. This reinforces the topic and improves relevance.
- Include Brand Name if Appropriate: If relevant, include the brand name in the file name for product images to enhance brand visibility.
- Use Consistent Naming Conventions: Develop and maintain a consistent naming convention across all images on your site. This helps in organizing and managing image files efficiently.
Tools for Bulk Renaming
For websites with many images, consider using tools like Bulk Rename Utility or NameChanger to rename multiple files quickly and consistently.
By following these steps, you can optimize your image content effectively, helping search engines understand and index your images better, thereby improving your overall SEO performance.
Add Alt Text
Alt text provides context to images, aiding accessibility and helping search engines understand the image content. Use concise, descriptive alt text that includes relevant keywords.
Adding Alt Text: Steps and Examples
Steps to Add Alt Text
- Identify the Purpose of the Image: Determine what the image represents and its role in the content.
- Describe the Image Clearly: Write a concise description of the image that conveys its content and context.
- Include Relevant Keywords: Integrate keywords naturally, but avoid keyword stuffing.
- Keep it Concise: Aim for 125 characters or fewer to ensure the alt text is brief and to the point.
- Avoid Redundancy: Do not repeat information already present in the surrounding text.
Examples
Example 1: Product Image
Image Description: A blue, long-sleeve cotton shirt on a white background.
Alt Text: “Blue long-sleeve cotton shirt”
Example 2: Infographic
Image Description: An infographic showing steps to reduce energy consumption at home.
Alt Text: “Infographic on steps to reduce home energy consumption: use LED bulbs, unplug devices, install smart thermostats”
Example 3: Landscape Photo
Image Description: A sunset over the Grand Canyon with vivid orange and pink skies.
Alt Text: “Sunset over the Grand Canyon with orange and pink skies”
Tools for Adding Alt Text
- Content Management Systems (CMS): Most CMS platforms like WordPress, Squarespace, and Wix have fields for alt text when you upload images.
- HTML: Use the alt attribute within the img tag.
html
<img src=”solar-panel-installation.jpg” alt=”Technician installing solar panels on a residential roof”>
- By following these steps and examples, you can effectively optimize your images for GoogleOther-Image, improving accessibility and SEO.
Compress Images
Large images can slow down your website. Use image compression tools to reduce file size without compromising quality. Tools like TinyPNG and JPEG-Optimizer are excellent for this purpose.
Tips for Compressing Images
- Choose the Right Format:
- JPEG: Best for photographs and images with many colors. Allows for adjustable compression levels.
- PNG: Ideal for images with transparent backgrounds and simple graphics. Less effective for compression.
- WebP: A modern format that provides superior compression for both lossless and lossy images.
- GIF: Suitable for simple animations but not recommended for static images due to large file sizes.
- Adjust Compression Settings:
- Use image editing software or online tools to adjust the compression level. Higher compression reduces file size but can decrease image quality.
- Tools like Photoshop, GIMP, and online services (e.g., TinyPNG, Compressor.io) allow you to set the compression level.
- Resize Images:
- Reduce the dimensions of the image to the required size. Larger images take up more space.
- Use software or online tools to resize images while maintaining aspect ratios.
- Remove Unnecessary Metadata:
- Metadata includes information like camera settings, GPS data, and more. Removing this can reduce file size.
- Tools like ExifTool can strip metadata from images.
- Use Image Compression Tools:
- Online Tools: TinyPNG, Compressor.io, ImageOptim, JPEG-Optimizer.
- Software: Adobe Photoshop, GIMP, Paint.NET.
- Command-Line Tools: ImageMagick, jpegoptim, pngquant.
- Consider Lazy Loading:
- For web images, implement lazy loading to defer loading of off-screen images until they are needed.
Examples of Compressing Images
- Using TinyPNG:
- Before Compression: A 2MB PNG image.
- After Compression: The image size reduced to 500KB with minimal loss in quality.
- Using Photoshop:
- Original Image: A 4MB JPEG photo.
- Process: Use the ‘Save for Web’ option, set quality to 60%.
- Result: The file size reduced to 800KB with noticeable but acceptable quality loss.
- Using ImageMagick (Command Line):
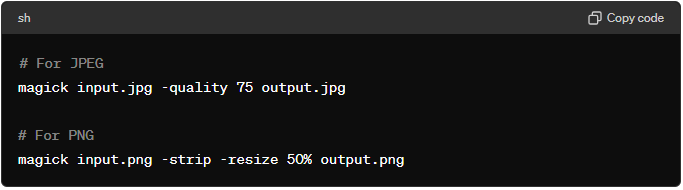
- Original Image: 1MB JPEG.
- After Compression: The file size reduced to 200KB.
- Using GIMP:
- Open the image in GIMP.
- Export as JPEG or PNG with adjusted quality/compression settings.
- Original Image: 3MB.
- Compressed Image: 600KB.
- Using WebP Format:
- Convert an existing JPEG or PNG to WebP.
- Original PNG: 1MB.
- WebP Conversion: The file size reduced to 150KB with no visible quality loss.

Practical Example: Compressing an Image for Web Use
- Original Image:
- File Size: 5MB
- Format: PNG
- Dimensions: 3000×2000 pixels
- Steps to Compress:
- Resize to 1500×1000 pixels.
- Convert to JPEG with 70% quality.
- Strip metadata.
- Using TinyPNG:
- Upload the image to TinyPNG.
- Download the compressed image.
- Result:
- New File Size: 400KB
- Quality: High, suitable for web use.
By following these tips and using the appropriate tools, you can effectively compress images to optimize performance while maintaining acceptable quality.
Optimize Video Content
Host Videos on Reliable Platforms
Host your videos on platforms like YouTube or Vimeo to ensure fast loading times and better indexing by GoogleOther-Video.
Steps to Host Videos on Reliable Platforms
- Choose a Platform:
- Consider your needs (e.g., audience, monetization, customization).
- Evaluate platforms based on features, pricing, and user reviews.
- Create an Account:
- Sign up for the chosen platform.
- Choose an appropriate plan based on your needs (free, premium, business).
- Upload Your Video:
- Prepare your video file (format, resolution).
- Upload the video using the platform’s interface.
- Customize Settings:
- Set privacy options (public, private, unlisted).
- Add metadata (title, description, tags).
- Customize the video player (colors, logo).
- Embed or Share:
- Get the embed code to integrate the video on your website.
- Share the video link on social media or via email.
- Monitor Performance:
- Use the platform’s analytics to track views, engagement, and other metrics.
- Adjust your strategy based on performance data.
Examples of Hosting Videos on Reliable Platforms
Example 1: YouTube
- Create an Account:
- Sign up or log in to your Google account.
- Go to YouTube and create a channel if you don’t have one.
- Upload Video:
- Click on the camera icon with a plus sign (“Create a video or post”).
- Select “Upload video.”
- Drag and drop your video file or select it from your computer.
- Customize Settings:
- Add a title, description, and tags.
- Set the privacy setting (public, private, unlisted).
- Add the video to a playlist if desired.
- Customize the thumbnail.
- Embed or Share:
- After the upload is complete, go to the video’s page.
- Click on “Share” to get the link or embed code.
- Embed the video on your website or share the link.
- Monitor Performance:
- Go to YouTube Studio to access analytics.
- Track views, watch time, and audience demographics.
Example 2: Vimeo
- Create an Account:
- Sign up for Vimeo and choose a plan (Basic, Plus, Pro).
- Upload Video:
- Click on “New Video” > “Upload.”
- Drag and drop your video file or select it from your computer.
- Customize Settings:
- Add a title, description, and tags.
- Set privacy options (public, private, password-protected).
- Customize the player (colors, logo).
- Embed or Share:
- Click on the video and select “Share.”
- Get the embed code or share the link.
- Monitor Performance:
- Use Vimeo’s analytics to track views, engagement, and other metrics.
Example 3: Wistia
- Create an Account:
- Sign up for Wistia and choose a plan.
- Upload Video:
- Click on “New Video” > “Upload Video.”
- Drag and drop your video file or select it from your computer.
- Customize Settings:
- Add a title and description.
- Set privacy options.
- Customize the player (colors, logo).
- Embed or Share:
- Click on “Embed & Share.”
- Get the embed code or share the link.
- Monitor Performance:
- Use Wistia’s analytics to track engagement and viewer behavior.
Practical Example: Hosting a Business Webinar
- Platform: Vimeo
- Reason: High-quality playback, privacy controls, and professional features.
- Steps:
- Create Account: Sign up for a Vimeo Pro account.
- Upload Video: Click on “New Video” > “Upload” and upload the recorded webinar.
- Customize Player: Go to the video settings and customize the player to match your brand colors.
- Set Privacy: Set the video to ‘private’ and generate a password for access.
- Embed on Website: Copy the embed code and paste it into a protected page on your website.
- Share with Audience: Share the password and link with your audience via email.
- Result:
- Secure, high-quality video playback for your webinar attendees.
- Detailed analytics to track viewer engagement and feedback.
By following these steps and examples, you can host videos effectively on reliable platforms, ensuring a smooth and professional experience for your viewers.
Use Descriptive Titles and Descriptions
For each video, use a descriptive title and detailed description. Include relevant keywords to improve searchability.
Steps to Create Descriptive Titles and Descriptions
- Understand Your Content:
- Identify the main topic and key points of your content.
- Determine the primary purpose and target audience.
- Research Keywords:
- Use keyword research tools (e.g., Google Keyword Planner, SEMrush, Ahrefs) to find relevant keywords and phrases.
- Focus on keywords with high search volume and relevance to your content.
- Craft a Descriptive Title:
- Include primary keywords early in the title.
- Make it concise, informative, and compelling.
- Aim for 50-60 characters to ensure it displays well in search results.
- Write an Informative Description:
- Summarize the key points and purpose of the content.
- Include secondary keywords naturally.
- Provide additional context or value to encourage clicks and engagement.
- Aim for 150-160 characters for meta descriptions, but longer descriptions can be used in the content body.
- Use a Consistent Style:
- Maintain a consistent tone and style that aligns with your brand.
- Use proper grammar, punctuation, and capitalization.
Examples of Descriptive Titles and Descriptions
Example 1: YouTube Video
- Content: A tutorial on how to bake a chocolate cake.
- Descriptive Title:
- “Easy Chocolate Cake Recipe | Step-by-Step Baking Tutorial”
- Informative Description:
- “Learn how to bake a delicious chocolate cake with this easy-to-follow tutorial. Perfect for beginners, this recipe uses simple ingredients and straightforward steps. Subscribe for more baking tips and recipes!”
Example 2: Blog Post
- Content: An article about the benefits of meditation.
- Descriptive Title:
- “10 Proven Benefits of Daily Meditation for Mental Health”
- Informative Description:
- “Discover the top 10 benefits of incorporating meditation into your daily routine. From reducing stress to improving focus, learn how meditation can enhance your mental health and well-being. Read on for tips and insights.”
Example 3: E-commerce Product
- Content: A product page for a smartwatch.
- Descriptive Title:
- “Smartwatch 2024 Model | Fitness Tracker with Heart Rate Monitor”
- Informative Description:
- “Stay connected and track your fitness with the 2024 model smartwatch. Features include a heart rate monitor, GPS, and customizable watch faces. Perfect for an active lifestyle, this smartwatch is compatible with iOS and Android devices. Order now and get free shipping!”
Example 4: Instagram Post
- Content: A photo of a sunset at the beach.
- Descriptive Title:
- “Stunning Sunset at Malibu Beach”
- Informative Description:
- “Captured this beautiful sunset at Malibu Beach yesterday. The colors were absolutely breathtaking! #sunset #beachlife #Malibu #naturephotography”
Example 5: Online Course
- Content: An online course on digital marketing.
- Descriptive Title:
- “Digital Marketing Mastery | Complete Online Course for Beginners”
- Informative Description:
- “Become a digital marketing expert with our comprehensive online course. Learn SEO, social media marketing, email marketing, and more from industry professionals. Perfect for beginners, this course includes video lessons, quizzes, and practical assignments. Enroll now and start your journey to digital marketing mastery!”
Practical Example: Writing a Descriptive Title and Description for a YouTube Cooking Channel
- Content: A video recipe for vegan lasagna.
- Steps:
- Research Keywords: Use tools to find keywords like “vegan lasagna recipe,” “easy vegan lasagna,” and “plant-based lasagna.”
- Create a Title: Combine the primary keyword with an engaging phrase.
- Write a Description: Summarize the recipe, include secondary keywords, and add a call to action.
- Descriptive Title:
- “Easy Vegan Lasagna Recipe | Delicious Plant-Based Meal”
- Informative Description:
- “Make a delicious vegan lasagna with this easy recipe! Perfect for a healthy, plant-based meal, this lasagna is packed with flavor and nutrients. Follow along with our step-by-step guide and enjoy a hearty, cruelty-free dish. Don’t forget to like, comment, and subscribe for more vegan recipes! #vegan #lasagna #plantbased”
By following these steps and using these examples, you can create effective and descriptive titles and descriptions that improve discoverability, engagement, and clarity for your audience.
Add Transcripts and Captions
Transcripts and captions make your videos accessible and provide additional text for crawlers to index, improving your video’s SEO.
Steps to Add Transcripts and Captions
- Prepare the Transcript:
- Manual Transcription: Listen to the audio and type out the spoken content.
- Automated Tools: Use speech-to-text software like Otter.ai, Rev, or Google’s Speech-to-Text API to generate a transcript.
- Editing: Review and edit the transcript for accuracy.
- Format the Transcript:
- Organize the text in a readable format.
- Include speaker labels if there are multiple speakers.
- Break the text into paragraphs or time-coded segments.
- Create Caption Files:
- SubRip Subtitle (SRT): Common format for captions, includes time codes.
- WebVTT: Another widely used format, suitable for HTML5 video.
- Tools: Use captioning tools like Subtitle Edit, Aegisub, or online editors to create and format caption files.
- Upload Transcripts and Captions:
- YouTube:
- Go to YouTube Studio.
- Select the video you want to add captions to.
- Click on “Subtitles” in the left menu.
- Click on “Add Language” and select your language.
- Upload the SRT file or use the auto-sync feature to align your transcript with the video.
- Vimeo:
- Go to your video settings.
- Select “Advanced” then “Subtitles.”
- Upload your caption file (SRT, WebVTT).
- Facebook:
- Go to your video post.
- Click on “Edit Post.”
- Select “Captions” and upload your SRT file.
- YouTube:
- Embed Transcripts on Your Website:
- Add the transcript below the embedded video for accessibility and SEO benefits.
- Ensure the transcript is properly formatted and easy to read.
Examples of Adding Transcripts and Captions
Example 1: YouTube Video
- Content: A tutorial on how to use Adobe Photoshop.
- Steps:
- Prepare the Transcript: Use Otter.ai to transcribe the video automatically.
- Edit the Transcript: Review the generated text and correct any errors.
- Create Caption File: Use Subtitle Edit to format the text into an SRT file.
- Upload to YouTube: Go to YouTube Studio, select the video, click “Subtitles,” add the language, and upload the SRT file.
- Result:
- The video now has accurate captions, making it accessible to a wider audience, including those with hearing impairments.
- The transcript can also be added to the video description for better SEO.
Example 2: Vimeo Video
- Content: A promotional video for a new product.
- Steps:
- Prepare the Transcript: Manually transcribe the video or use a tool like Rev.com.
- Edit the Transcript: Ensure all product details and key messages are accurately captured.
- Create Caption File: Use WebVTT format for compatibility with Vimeo.
- Upload to Vimeo: Go to the video settings, select “Advanced,” then “Subtitles,” and upload the WebVTT file.
- Result:
- Captions appear on the video, improving accessibility and user experience.
- The transcript can be included in the video’s description or a blog post for added SEO benefits.
Example 3: Facebook Video
- Content: A live interview with an industry expert.
- Steps:
- Prepare the Transcript: Use an automated tool like Temi to transcribe the live video.
- Edit the Transcript: Review the transcript for accuracy, particularly names and technical terms.
- Create Caption File: Format the text into an SRT file using Aegisub.
- Upload to Facebook: Edit the video post, select “Captions,” and upload the SRT file.
- Result:
- The video now includes captions, making it accessible to a broader audience and improving engagement.
- The transcript can be used in a blog post summarizing the interview.
Practical Example: Adding Transcripts and Captions to a Webinar Recording
- Content: A recorded webinar on digital marketing trends.
- Steps:
- Prepare the Transcript: Use Rev.com to get an accurate transcript of the webinar.
- Edit the Transcript: Review and edit the text for clarity and accuracy.
- Create Caption File: Use Subtitle Edit to format the transcript into an SRT file.
- Upload to Hosting Platform: If using YouTube, go to YouTube Studio, select the webinar video, click “Subtitles,” add the language, and upload the SRT file. If using Vimeo, go to video settings, select “Advanced,” then “Subtitles,” and upload the SRT file.
- Embed the Transcript:
- Add the transcript below the embedded video on your website for better accessibility and SEO.
- Result:
- The webinar video now has captions, improving accessibility for all viewers.
- The transcript provides an additional resource for viewers and enhances SEO, making the content more discoverable.
By following these steps and examples, you can ensure your videos are accessible, improve user engagement, and boost your SEO efforts.
Leveraging Google’s E-A-T Standards Is still going to be prominent in New Google algorithm update 2024
Showcase Expertise
Create High-Quality Content
Ensure your content is well-researched, accurate, and provides value to your audience. High-quality content establishes your expertise and encourages user engagement.
Steps to Create High-Quality Content
- Identify Your Audience:
- Determine who your target audience is.
- Understand their needs, preferences, and pain points.
- Research Your Topic:
- Conduct thorough research to gather accurate and up-to-date information.
- Use reliable sources such as academic papers, industry reports, and reputable websites.
- Identify relevant keywords using tools like Google Keyword Planner, Ahrefs, or SEMrush.
- Plan Your Content:
- Create an outline to organize your ideas and ensure a logical flow.
- Define the main points you want to cover.
- Decide on the format (e.g., blog post, video, infographic, podcast).
- Craft a Compelling Headline:
- Make it catchy and informative.
- Use power words to evoke curiosity or emotion.
- Include primary keywords for SEO benefits.
- Write or Create the Content:
- Start with a strong introduction that grabs attention.
- Provide valuable, well-researched information in the body.
- Use subheadings, bullet points, and visuals to enhance readability.
- Maintain a consistent tone and style that aligns with your brand.
- End with a clear call-to-action (CTA).
- Edit and Proofread:
- Check for grammar, spelling, and punctuation errors.
- Ensure the content is clear, concise, and free of jargon.
- Verify the accuracy of facts and figures.
- Optimize for SEO:
- Use relevant keywords naturally throughout the content.
- Optimize meta titles, descriptions, and headers.
- Include internal and external links.
- Use alt text for images.
- Promote Your Content:
- Share on social media platforms.
- Use email newsletters to reach your subscribers.
- Engage with your audience by responding to comments and questions.
- Analyze and Improve:
- Use analytics tools to track performance.
- Monitor metrics such as page views, engagement, and conversions.
- Use feedback to improve future content.
Examples of Creating High-Quality Content
Example 1: Blog Post
- Audience: Small business owners looking for marketing tips.
- Topic: “10 Effective Marketing Strategies for Small Businesses”
- Research: Gather data from marketing studies, expert opinions, and case studies.
- Outline:
- Introduction: Importance of effective marketing
- Strategy 1: Content Marketing
- Strategy 2: Social Media Marketing
- Strategy 3: Email Marketing
- …
- Conclusion: Summary and call-to-action
- Headline: “Boost Your Business: 10 Effective Marketing Strategies for Small Businesses”
- Content:
- Introduction: “In today’s competitive market, small businesses need to leverage effective marketing strategies to stand out. Here are ten proven tactics to help you boost your business…”
- Body: Detailed explanations, statistics, examples, and actionable tips for each strategy.
- Conclusion: “Implement these strategies to see significant growth in your business. Don’t forget to subscribe to our newsletter for more tips and insights.”
- Edit and Proofread: Use tools like Grammarly and Hemingway.
- Optimize for SEO: Incorporate keywords, optimize meta tags, and add internal links to related articles.
- Promote: Share on LinkedIn, Twitter, and in your business newsletter.
- Analyze: Use Google Analytics to track traffic and engagement.
Example 2: Video
- Audience: Fitness enthusiasts looking for home workout routines.
- Topic: “15-Minute Full-Body Home Workout”
- Research: Gather information on effective exercises, proper form, and benefits.
- Outline:
- Introduction: Brief overview of the workout
- Warm-up: 3 minutes of dynamic stretches
- Workout: 10 exercises, 1 minute each
- Cool-down: 2 minutes of stretching
- Conclusion: Motivational message and call-to-action
- Headline: “Get Fit Fast: 15-Minute Full-Body Home Workout”
- Content:
- Introduction: “Welcome to our 15-minute full-body workout. No equipment needed, just your body weight. Let’s get started!”
- Warm-up: Demonstrate dynamic stretches.
- Workout: Show each exercise with proper form and modifications.
- Cool-down: Guide viewers through stretches.
- Conclusion: “Great job! Repeat this workout 3 times a week for best results. Subscribe for more fitness tips!”
- Edit and Proofread: Use video editing software like Adobe Premiere or Final Cut Pro.
- Optimize for SEO: Add relevant tags, a detailed description, and a catchy thumbnail.
- Promote: Share on YouTube, Instagram, and in fitness forums.
- Analyze: Use YouTube Analytics to track views, watch time, and audience retention.
Example 3: Infographic
- Audience: Health-conscious individuals looking for nutritional advice.
- Topic: “Superfoods for a Healthy Diet”
- Research: Collect information on various superfoods, their benefits, and nutritional content.
- Outline:
- Introduction: What are superfoods?
- Section 1: Fruits (e.g., berries, avocado)
- Section 2: Vegetables (e.g., kale, spinach)
- Section 3: Grains and Seeds (e.g., quinoa, chia seeds)
- Section 4: Nuts and Legumes (e.g., almonds, lentils)
- Conclusion: Incorporating superfoods into your diet
- Headline: “The Ultimate Guide to Superfoods for a Healthy Diet”
- Content:
- Introduction: Brief explanation of superfoods and their benefits.
- Body: Visually appealing sections with images and nutritional information for each superfood.
- Conclusion: Tips for adding superfoods to meals.
- Edit and Proofread: Use graphic design tools like Canva or Adobe Illustrator.
- Optimize for SEO: Add alt text for images and include a descriptive file name.
- Promote: Share on Pinterest, Instagram, and health blogs.
- Analyze: Use social media analytics to track shares, likes, and comments.
By following these steps and using these examples, you can create high-quality content that engages your audience, improves your online presence, and drives results.
Include Author Bios
Adding author bios with credentials and relevant experience can enhance the perceived expertise of your content. This is particularly important for blogs and articles.
Steps to Create and Include Author Bios
- Collect Author Information:
- Gather relevant details about the author such as their full name, professional title, and background.
- Include their expertise, experience, and any notable achievements.
- Add personal interests or hobbies if they are relevant to the content.
- Write the Bio:
- Start with a Strong Introduction: Include the author’s name and a brief description of their role or expertise.
- Highlight Key Achievements: Mention notable accomplishments, awards, or recognitions.
- Showcase Expertise: Explain the author’s expertise in the content they create.
- Personal Touch: Add a personal element to make the bio more relatable, such as hobbies or interests.
- Include a Call-to-Action: Encourage readers to follow the author on social media or visit their website.
- Keep it Concise:
- Aim for 50-100 words for a short bio.
- For more detailed bios, keep it under 200 words.
- Format Consistently:
- Use a consistent format across all author bios on your site.
- Include a professional headshot of the author.
- Add Social Media Links:
- Provide links to the author’s social media profiles, blog, or website.
- Use icons or hyperlinks for easy access.
- Update Regularly:
- Keep bios up-to-date with any new achievements, roles, or publications.
- Regularly review and refresh the content to ensure accuracy.
Examples of Author Bios
Example 1: Blog Author Bio
Author: Jane Smith
Bio:
Jane Smith is a seasoned digital marketer with over 10 years of experience in the industry. She specializes in content strategy and SEO, helping businesses increase their online visibility and drive organic traffic. Jane’s insights have been featured in major marketing publications, and she is a frequent speaker at industry conferences. When she’s not optimizing websites, Jane enjoys hiking and exploring new culinary adventures. Connect with her on Twitter @JaneSmithSEO.
Example 2: Book Author Bio
Author: John Doe
Bio:
John Doe is an award-winning author and historian, known for his extensive research on ancient civilizations. With a Ph.D. in Archaeology from Harvard University, John has published several bestselling books that bring history to life for his readers. His latest book, “Secrets of the Pharaohs,” delves into the mysteries of ancient Egypt with captivating storytelling. Outside of his writing, John enjoys traveling the world and uncovering new historical sites. Visit his website at www.johndoeauthor.com to learn more.
Example 3: Academic Author Bio
Author: Dr. Emily Johnson
Bio:
Dr. Emily Johnson is a Professor of Environmental Science at Stanford University, where she conducts groundbreaking research on climate change and its impact on global ecosystems. With numerous publications in peer-reviewed journals and a passion for educating the next generation of scientists, Dr. Johnson is a leading voice in her field. She has received multiple awards for her research and teaching excellence. In her free time, she enjoys bird-watching and volunteering for conservation projects. Follow her research updates on LinkedIn.
Example 4: Corporate Blog Author Bio
Author: Michael Lee
Bio:
Michael Lee is the Chief Technology Officer at Tech Innovators Inc., where he leads a team of engineers in developing cutting-edge software solutions. With over 15 years of experience in the tech industry, Michael is an expert in AI and machine learning. He holds several patents and has been a keynote speaker at international tech conferences. Michael’s articles offer deep insights into the latest technological advancements and industry trends. Follow him on LinkedIn to stay updated on his latest projects.
Example 5: Magazine Contributor Bio
Author: Sarah Thompson
Bio:
Sarah Thompson is a freelance travel writer and photographer whose work has appeared in National Geographic, Travel + Leisure, and Lonely Planet. With a passion for exploring off-the-beaten-path destinations, Sarah’s stories capture the essence of adventure and cultural discovery. Her award-winning photography has been exhibited in galleries around the world. Follow her journey on Instagram @SarahTravels.
Practical Example: Including an Author Bio in a Blog Post
- Blog Post Topic: “Top 10 SEO Tips for Small Businesses”
- Author: Jane Smith
- Author Bio:
- Collect information about Jane’s expertise in SEO, her professional background, and any notable achievements.
- Write a concise bio that highlights her experience and invites readers to connect with her.
- Bio:
- “Jane Smith is a seasoned digital marketer with over 10 years of experience in the industry. She specializes in content strategy and SEO, helping businesses increase their online visibility and drive organic traffic. Jane’s insights have been featured in major marketing publications, and she is a frequent speaker at industry conferences. When she’s not optimizing websites, Jane enjoys hiking and exploring new culinary adventures. Connect with her on Twitter @JaneSmithSEO.”
- Format and Include:
- Add the bio at the end of the blog post, along with a professional headshot of Jane.
- Include a link to her Twitter profile.
By following these steps and using these examples, you can create engaging and informative author bios that enhance your content’s credibility and connect with your audience.
Establish Authoritativeness
Gain High-Quality Backlinks
Backlinks from reputable websites signal to Google that your content is authoritative. Aim to build relationships with other websites and earn backlinks through guest posts, collaborations, and high-quality content.
Steps to Gain High-Quality Backlinks
- Create High-Quality Content:
- Produce valuable, informative, and engaging content that others will want to link to.
- Examples include blog posts, infographics, case studies, and original research.
- Identify Link-Building Opportunities:
- Use tools like Ahrefs, SEMrush, or Moz to find websites that link to similar content.
- Identify authoritative sites in your niche that might be interested in your content.
- Build Relationships:
- Network with industry influencers, bloggers, and webmasters.
- Engage with them on social media, comment on their blogs, and share their content.
- Guest Blogging:
- Write high-quality guest posts for reputable websites in your industry.
- Ensure your guest post includes a link back to your website.
- Reach Out for Backlinks:
- Contact website owners and editors to inform them about your content.
- Explain why your content would be valuable to their readers and suggest adding a link.
- Utilize Social Media:
- Share your content on social media platforms to increase its visibility.
- Engage with your audience and encourage them to share your content.
- Submit to Directories:
- Submit your website to high-quality directories relevant to your niche.
- Ensure the directories are reputable and have good domain authority.
- Leverage Broken Link Building:
- Find broken links on authoritative websites in your niche.
- Contact the webmaster to inform them about the broken link and suggest your content as a replacement.
- Create Link-Worthy Content:
- Develop content types that are naturally more likely to attract backlinks, such as:
- Comprehensive guides and tutorials
- Infographics and visual content
- Original research and data reports
- Lists of useful tools and resources
- Develop content types that are naturally more likely to attract backlinks, such as:
- Monitor and Analyze Backlinks:
- Use tools like Google Analytics, Ahrefs, or Moz to track your backlinks.
- Analyze which strategies are working best and adjust your approach accordingly.
Examples of Gaining High-Quality Backlinks
Example 1: Guest Blogging
- Identify Target Blogs:
- Use tools like Ahrefs to find blogs in the digital marketing niche with high domain authority.
- Example: Identify “MarketingProfs” as a target blog.
- Pitch a Guest Post:
- Reach out to the editor of MarketingProfs with a pitch for a guest post titled “10 Advanced SEO Strategies for 2024.”
- Highlight your expertise and include examples of your previous work.
- Write and Submit the Post:
- Write a high-quality, informative post.
- Include a link to your website in the author bio or within the content where relevant.
- Result:
- Your guest post is published on MarketingProfs, earning you a high-quality backlink from a reputable site.
Example 2: Broken Link Building
- Identify Broken Links:
- Use tools like Ahrefs or Check My Links to find broken links on authoritative sites in your niche.
- Example: Find a broken link on a popular marketing blog that points to outdated SEO statistics.
- Create Replacement Content:
- Write a detailed article with updated SEO statistics.
- Reach Out:
- Contact the webmaster of the marketing blog.
- Inform them about the broken link and suggest your updated article as a replacement.
- Result:
- The webmaster updates the broken link to point to your article, earning you a high-quality backlink.
Example 3: Creating Link-Worthy Content
- Content Creation:
- Create a comprehensive guide titled “The Ultimate Guide to Content Marketing for Beginners.”
- Promotion:
- Share the guide on social media, in industry forums, and through your email newsletter.
- Reach out to influencers and bloggers in your niche to inform them about your guide.
- Result:
- Influencers and bloggers find the guide valuable and link to it from their own content.
- Your guide attracts multiple high-quality backlinks.
Example 4: Leveraging Social Media
- Content Creation:
- Create an infographic titled “2024 Social Media Trends.”
- Share on Social Media:
- Post the infographic on your social media channels.
- Tag relevant influencers and industry leaders.
- Engage and Encourage Sharing:
- Engage with your audience and encourage them to share the infographic.
- Result:
- The infographic gains traction, and other websites link to it as a valuable resource.
Practical Example: Gaining Backlinks for a Tech Blog
- Content Creation:
- Write an in-depth blog post titled “Top 10 Emerging Technologies in 2024.”
- Identify Opportunities:
- Use Ahrefs to find technology blogs and websites with high domain authority that have links to similar content.
- Outreach:
- Reach out to the editors of these blogs, explaining why your post is valuable and suggesting they link to it.
- Example email:
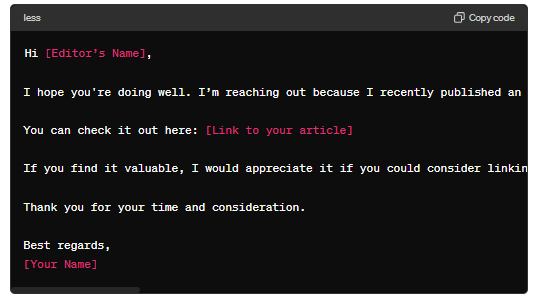
- Result:
- Some editors agree to link to your post, earning you high-quality backlinks from reputable tech sites.
By following these steps and using these examples, you can effectively build high-quality backlinks that enhance your website’s SEO and drive valuable traffic.
Cite Reliable Sources
When writing articles, cite reliable sources to back up your claims. This adds credibility and demonstrates thorough research.
Steps to Cite Reliable Sources
- Identify Reliable Sources:
- Use reputable publications, academic journals, books, and authoritative websites.
- Verify the credentials of the authors and the publication’s reputation.
- Gather Necessary Information:
- Collect the author’s name, title of the source, publication date, publisher, and URL if it’s an online source.
- Choose a Citation Style:
- Select the appropriate citation style based on your field or the guidelines provided (e.g., APA, MLA, Chicago, Harvard).
- Format the Citation:
- Follow the specific rules for the chosen citation style.
- Include all required information in the correct order.
- In-Text Citations:
- Provide brief in-text citations within the content to attribute the source.
- Use parentheses or footnotes as required by the citation style.
- Compile a Reference List:
- Include a full reference list or bibliography at the end of your document.
- Ensure all sources cited in the text are included in the reference list.
Examples of Citing Reliable Sources
Example 1: APA Style
Book Citation:
- In-Text Citation: (Smith, 2020)
- Reference List:

Journal Article Citation:
- In-Text Citation: (Doe, 2019)
- Reference List:

Website Citation:
- In-Text Citation: (Johnson, 2021)
- Reference List:

Example 2: MLA Style
Book Citation:
- In-Text Citation: (Smith 45)
- Works Cited:

Journal Article Citation:
- In-Text Citation: (Doe 123)
- Works Cited:

- In-Text Citation: (Johnson)
- Works Cited:

Example 3: Chicago Style
Book Citation:
- In-Text Citation: (Smith 2020, 45)
- Bibliography:

Journal Article Citation:
- In-Text Citation: (Doe 2019, 123)
- Bibliography:

Website Citation:
- In-Text Citation: (Johnson 2021)
- Bibliography:

Practical Example: Citing Reliable Sources in a Research Paper
- Topic: The impact of climate change on polar bear populations.
- Identify Reliable Sources:
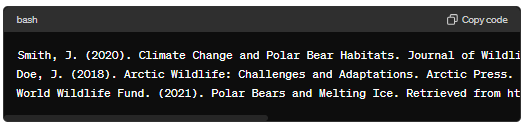
- A peer-reviewed journal article titled “Climate Change and Polar Bear Habitats” by Jane Smith, published in the Journal of Wildlife Research.
- A book titled “Arctic Wildlife: Challenges and Adaptations” by John Doe.
- A reputable website article “Polar Bears and Melting Ice” from the World Wildlife Fund.
- APA Style Citations:
- In-Text Citations:
- (Smith, 2020)
- (Doe, 2018)
- (World Wildlife Fund, 2021)
- Reference List:
- In-Text Citations:
By following these steps and using these examples, you can effectively cite reliable sources, enhancing the credibility and integrity of your work.
Build Trustworthiness
Ensure Website Security
Use HTTPS to secure your website. A secure website is essential for building trust with both users and search engines.
Steps to Ensure Website Security
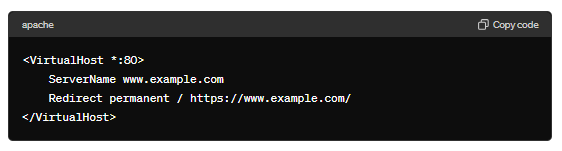
- Use HTTPS:
- Obtain an SSL/TLS certificate for your website.
- Redirect all HTTP traffic to HTTPS to ensure encrypted communication.
- Keep Software Up-to-Date:
- Regularly update your CMS (e.g., WordPress, Joomla), plugins, themes, and other software.
- Apply security patches as soon as they are released.
- Implement Strong Authentication:
- Use strong, unique passwords for all accounts.
- Enable two-factor authentication (2FA) for additional security.
- Limit Login Attempts:
- Use tools or plugins to limit the number of failed login attempts.
- Implement CAPTCHA to prevent automated login attempts.
- Secure Web Server Configuration:
- Configure your web server (e.g., Apache, Nginx) securely.
- Disable unnecessary services and modules.
- Use a firewall to block unauthorized access.
- Regular Backups:
- Schedule regular backups of your website and database.
- Store backups securely offsite.
- Monitor and Scan for Vulnerabilities:
- Use security tools to scan your website for vulnerabilities.
- Monitor logs for suspicious activities.
- Use a Web Application Firewall (WAF):
- Implement a WAF to filter and monitor HTTP traffic between your web application and the internet.
- Secure File Uploads:
- Limit the types of files that can be uploaded.
- Use antivirus software to scan uploaded files.
- Set Proper File Permissions:
- Ensure that files and directories have the correct permissions.
- Restrict write access to sensitive files.
- Educate and Train Your Team:
- Train your team on security best practices.
- Keep them informed about the latest security threats.
Examples of Implementing Website Security
Example 1: Using HTTPS
- Obtain an SSL Certificate:
- Purchase an SSL certificate from a trusted Certificate Authority (CA) or use a free service like Let’s Encrypt.
- Install the SSL Certificate:
- Follow your web hosting provider’s instructions to install the SSL certificate.
- Redirect HTTP to HTTPS:
- Configure your web server to redirect all HTTP traffic to HTTPS.
Apache Configuration:
Nginx Configuration:
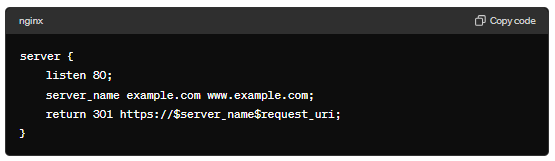
server {Example 2: Keeping Software Up-to-Date
- Update CMS and Plugins:
- For WordPress, go to Dashboard > Updates and update your core software, themes, and plugins.
- Enable Automatic Updates:
- Configure automatic updates for your CMS and plugins if possible.
- WordPress Example:

Example 3: Implementing Strong Authentication
- Use Strong Passwords:
- Create passwords with a combination of letters, numbers, and special characters.
- Enable Two-Factor Authentication:
- Use a plugin or service to enable 2FA.
- WordPress Example:
- Install and activate the “Two Factor Authentication” plugin.
- Configure 2FA from the plugin settings.
Example 4: Limiting Login Attempts
- Install a Security Plugin:
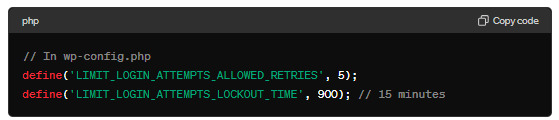
- Use a plugin like “Limit Login Attempts Reloaded” for WordPress.
- Configure Login Limits:
- Set the number of allowed login attempts and the lockout period.
Example Configuration:
Example 5: Using a Web Application Firewall (WAF)
- Choose a WAF Provider:
- Select a WAF provider like Cloudflare, Sucuri, or AWS WAF.
- Configure the WAF:
- Follow the provider’s instructions to set up and configure the WAF.
- Cloudflare Example:
- Sign up for a Cloudflare account and add your website.
- Configure the firewall rules and security settings from the Cloudflare dashboard.
Example 6: Regular Backups
- Schedule Backups:
- Use a plugin or service to schedule regular backups.
- WordPress Example:
- Install and configure a plugin like “UpdraftPlus.”
- Store Backups Securely:
- Store backups on a secure offsite location like cloud storage (e.g., Google Drive, AWS S3).
- UpdraftPlus Example:
- Go to Settings > UpdraftPlus Backups.
- Choose remote storage and authenticate your account.
By following these steps and implementing the examples provided, you can significantly enhance the security of your website, protecting it from potential threats and ensuring the safety of your data and your users’ information.
Display Contact Information
Provide clear and accessible contact information. This reassures users and search engines that your business is legitimate and trustworthy.
Steps to Display Contact Information
- Determine the Contact Information to Display:
- Decide what contact details you want to provide (e.g., phone number, email address, physical address, social media links, contact form).
- Choose the Location:
- Identify key areas on your website where contact information should be displayed, such as the header, footer, contact page, and sidebar.
- Design a Contact Page:
- Create a dedicated contact page that includes all necessary contact details and a contact form.
- Use a clean and user-friendly design.
- Include a Contact Form:
- Use a contact form to allow users to send messages directly through your website.
- Ensure the form is simple, easy to fill out, and asks for essential information only.
- Optimize for Mobile:
- Ensure that contact information is easily accessible and legible on mobile devices.
- Use responsive design techniques to optimize the contact page for mobile users.
- Use Icons and Visuals:
- Use icons for phone, email, and social media to make the contact information visually appealing and easy to understand.
- Include a map for physical locations.
- Ensure Accessibility:
- Use alt text for images and icons.
- Ensure that the contact form and information are accessible to users with disabilities.
- Maintain Consistency:
- Ensure that contact information is consistent across all pages and platforms.
Examples of Displaying Contact Information
Example 1: Contact Page
- Design and Layout:
- Header: Clear title, e.g., “Contact Us.”
- Body:
- Company Address:

- Phone Number:

- Email Address:

- Business Hours:

- Social Media Links: Icons linking to Facebook, Twitter, LinkedIn, etc.
- Contact Form: Name, email, subject, message fields, and a submit button.
- Map: Embedded Google Map showing the company location.
- HTML Example:

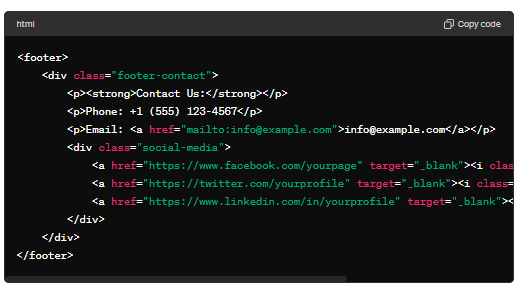
Example 2: Footer Contact Information
- Footer Layout:
- Include essential contact details such as phone number, email address, and social media icons.
- Display this information on every page of the website.
- HTML Example:
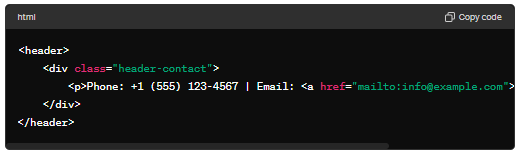
Example 3: Header Contact Information
- Header Layout:
- Display a phone number and email address in the header for easy access.
- Ensure the information is visible and accessible on all pages.
- HTML Example:
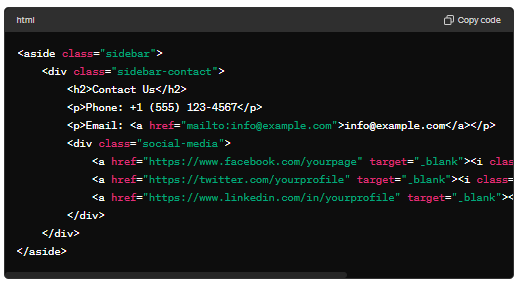
Example 4: Sidebar Contact Information
- Sidebar Layout:
- Add contact details to the sidebar to ensure it is visible while browsing different sections of the site.
- HTML Example:n
Practical Example: Displaying Contact Information for a Small Business Website
- Contact Page:
- Create a dedicated contact page with comprehensive contact details, a contact form, social media links, and a map.
- Header and Footer:
- Display the phone number and email address in both the header and footer of the website for easy access.
- Sidebar:
- Include contact information in the sidebar to ensure visibility across different sections of the site.
By following these steps and using these examples, you can effectively display contact information on your website, making it easy for users to get in touch with you and enhancing your site’s credibility and user experience.
Encourage Reviews and Testimonials
Positive reviews and testimonials can significantly boost your site’s trustworthiness. Encourage satisfied customers to leave reviews on platforms like Google My Business and Yelp.
Steps to Encourage Reviews and Testimonials
- Provide Excellent Service:
- Ensure that your product or service meets or exceeds customer expectations.
- Offer outstanding customer support and a positive user experience.
- Ask for Reviews Directly:
- Request reviews and testimonials from satisfied customers.
- Use personalized emails, in-person requests, or phone calls to ask for feedback.
- Make It Easy to Leave Reviews:
- Provide direct links to review sites like Google, Yelp, or industry-specific platforms.
- Simplify the review process with clear instructions and easy-to-follow steps.
- Offer Incentives:
- Provide incentives such as discounts, coupons, or entry into a contest for leaving a review.
- Ensure that incentives comply with the review platform’s guidelines.
- Follow Up with Customers:
- Send follow-up emails or messages thanking customers for their purchase and requesting a review.
- Include a link to the review page in the follow-up message.
- Showcase Reviews and Testimonials:
- Display reviews and testimonials prominently on your website, social media, and marketing materials.
- Create a dedicated testimonials page or feature them on your homepage.
- Respond to Reviews:
- Engage with customers by responding to their reviews, both positive and negative.
- Show appreciation for positive feedback and address any issues raised in negative reviews.
- Leverage Social Media:
- Encourage followers to leave reviews on your social media pages.
- Share positive reviews and testimonials on your social media accounts.
- Use Review Widgets:
- Integrate review widgets on your website to showcase reviews from third-party sites.
- Use plugins or embed codes to display reviews seamlessly.
Examples of Encouraging Reviews and Testimonials
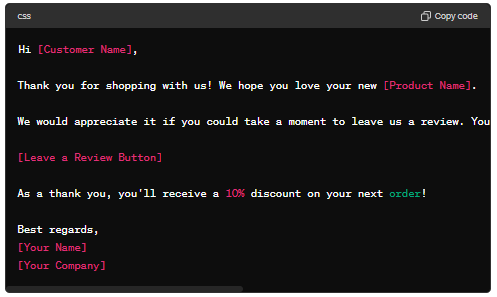
Example 1: Personalized Email Request
- Email Subject: “We’d Love to Hear Your Feedback!”
- Email Body:
Example 2: In-Person Request
- Scenario: A satisfied customer visits your store or office.
- Request:

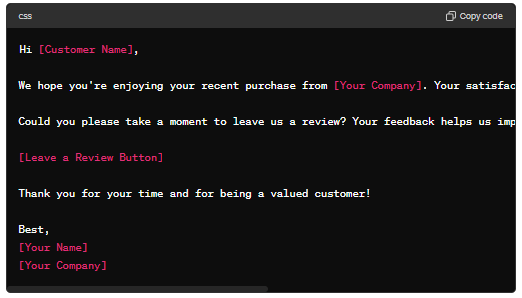
Example 3: Follow-Up Email
- Email Subject: “How Was Your Experience with [Your Company]?”
- Email Body:
Example 4: Social Media Post
- Post Content:

Example 5: Review Widget on Website
- HTML Example:
Practical Example: Encouraging Reviews for an E-commerce Store
- Provide Excellent Service:
- Ensure timely delivery, high-quality products, and responsive customer support.
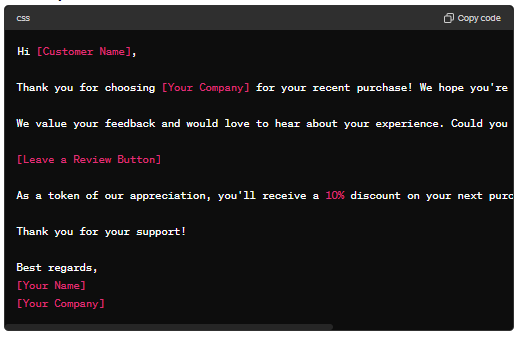
- Request Reviews in Order Confirmation Emails:
- Email Subject: “Thank You for Your Purchase! We’d Love Your Feedback”
- Email Body:
We would appreciate it if you could take a moment to leave us a review. Yo
- Follow Up After Delivery:
- Send a follow-up email a few days after delivery to ask for a review.
- Display Reviews on Product Pages:
- Show customer reviews and ratings on product pages to build trust and credibility.
- Share Reviews on Social Media:
- Post positive reviews and testimonials on your social media channels to encourage more feedback.
By following these steps and using these examples, you can effectively encourage reviews and testimonials, enhancing your brand’s credibility and attracting more customers.
Conclusion
Optimizing for GoogleOther-Image and GoogleOther-Video requires a strategic approach that incorporates both technical SEO and content quality. By adhering to Google’s E-A-T standards, you can enhance your site’s credibility, improve search engine rankings, and provide a better user experience. Focus on creating high-quality, optimized content that showcases your expertise, authoritativeness, and trustworthiness to stay ahead in the evolving landscape of Local SEO and for upcoming New Google algorithm update 2024
For more information on optimizing for GoogleOther-Image and GoogleOther-Video, refer to Google’s Webmaster Guidelines and Image and Video Best Practices.